In this blog post, we will provide instructions for installing vinyl plank flooring on stairs. Stairs can be challenging for some, so we advise working with an expert when possible.
What is Vinyl Plank Flooring:
Vinyl plank flooring is a versatile and durable flooring option that mimics the look of hardwood flooring. It’s made from several layers of synthetic materials, typically including PVC (polyvinyl chloride) and a plasticizer for flexibility, topped with a printed design layer that resembles wood grain, stone, or other natural materials. The layers are fused together under high heat and pressure to create a solid, resilient flooring material.
Vinyl plank flooring comes in planks that are typically long and narrow, similar in size to traditional hardwood planks. These planks often feature a tongue-and-groove system for easy installation, allowing them to click together seamlessly without the need for adhesives.
One of the key benefits of vinyl plank flooring is its durability. It’s highly resistant to scratches, stains, and water damage, making it an ideal choice for high-traffic areas, kitchens, bathrooms, and other moisture-prone spaces. Additionally, vinyl plank flooring is relatively low-maintenance, requiring only regular sweeping and occasional mopping to keep it looking its best.
Another advantage of vinyl plank flooring is its versatility in design. It’s available in a wide range of colors, styles, and textures, allowing homeowners to achieve the look of hardwood, tile, or stone flooring without the associated cost and maintenance requirements.
Overall, vinyl plank flooring offers a cost-effective, stylish, and practical flooring solution for both residential and commercial spaces, making it a popular choice among homeowners and designers alike.
Installing Vinyl Plank Flooring on Stairs:
Vinyl plank flooring has become increasingly popular for its durability, easy maintenance, and aesthetic appeal. While it’s commonly used in living spaces, many homeowners also opt to extend this flooring solution to their stairs. If you’re considering upgrading your staircase with vinyl plank flooring, you’ve come to the right place. In this comprehensive guide, we’ll walk you through the process of installing vinyl plank flooring on stairs.
Step 1: Gather Your Materials
Before diving into the installation process, make sure you have all the necessary materials and tools on hand:
-
Vinyl plank flooring
-
Adhesive or double-sided tape
-
Measuring tape
-
Utility knife
-
Saw (a circular saw or jigsaw)
-
Safety goggles
-
Protective gloves
-
Trowel or adhesive spreader
-
Level
-
Stair nosing (optional but recommended for a finished look)
Step 2: Measure and Prepare
Start by measuring each stair tread and riser accurately. It’s crucial to ensure precise measurements to avoid any gaps or overlaps during installation. Once you have your measurements, clean the stairs thoroughly, removing any dirt, dust, or debris.
Step 3: Cut the Vinyl Planks
Using your measurements, cut the vinyl planks to fit each stair tread and riser. Remember to leave a small gap (about 1/8 inch) between the plank and the stair edges to accommodate for expansion. Use a utility knife or a saw to make precise cuts.
Step 4: Apply Adhesive
Depending on the type of vinyl plank flooring you’re using, you may need to apply adhesive or double-sided tape to the back of each plank before installation. Follow the manufacturer’s instructions carefully when applying the adhesive.
Step 5: Install the Planks
Starting from the bottom of the staircase, begin installing the vinyl planks on the stair treads. Press each plank firmly into place, ensuring a tight bond with the adhesive or tape. Use a level to check that each plank is installed evenly and securely.
Step 6: Continue Up the Stairs
Work your way up the staircase, installing vinyl planks on each tread until you reach the top. Take your time to ensure each plank is aligned correctly and securely attached.
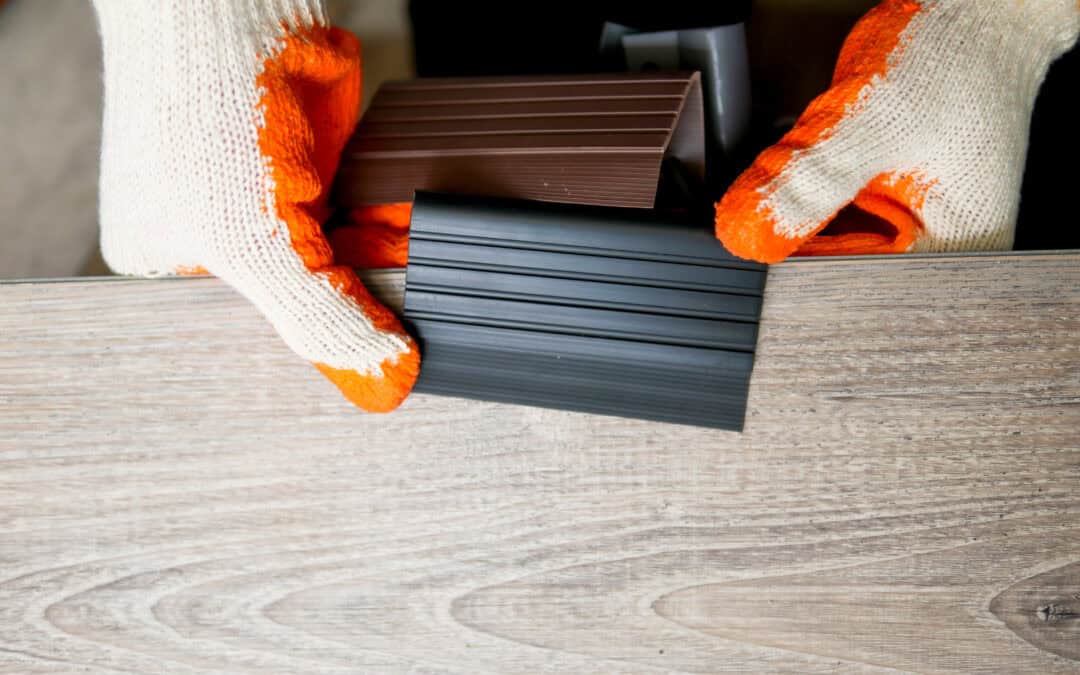
Step 7: Install Stair Nosing (Optional)
For added safety and a polished finish, consider installing stair nosing on the edges of each stair tread. Stair nosing provides a smooth transition between the vinyl plank flooring and the edge of the stairs, reducing the risk of tripping and enhancing the overall appearance.
Step 8: Final Touches
Once all the vinyl planks are installed, double-check for any loose edges or gaps. Make any necessary adjustments and ensure that the entire staircase is secure and level. Clean up any excess adhesive or debris.
Installing vinyl plank flooring on stairs is a rewarding DIY project that can enhance the beauty and functionality of your home. By following these step-by-step instructions and taking your time to ensure precision, you can achieve professional-looking results that will stand the test of time. Enjoy your newly transformed staircase!
At Northern Colorado Carpets, we understand that installing flooring can be a daunting task, especially when it comes to intricate areas like stairs. That’s why we offer professional installation services to ensure a seamless and stress-free experience for our customers. With years of expertise and a commitment to quality craftsmanship, our team of experts is equipped to handle the installation of vinyl plank flooring on stairs with precision and care. By partnering with us, you can save yourself the hassle of tackling the project alone and trust that your staircase will be transformed flawlessly. Let our skilled professionals take care of the hard work while you sit back and enjoy the beautiful results.
Recent Comments